A Step-by-Step Guide to Adding a Custom Calendar to Your Notion Journal for Better Tracking
Integrating a custom calendar into your Notion workspace can supercharge your productivity, helping you organize tasks, track profits/losses, and focus on active months of activity. This guide walks you through adding a custom calendar to your Notion journal step-by-step.
Step 1: Create a New Calendar
If you don't have an account read this guide to setup your account.
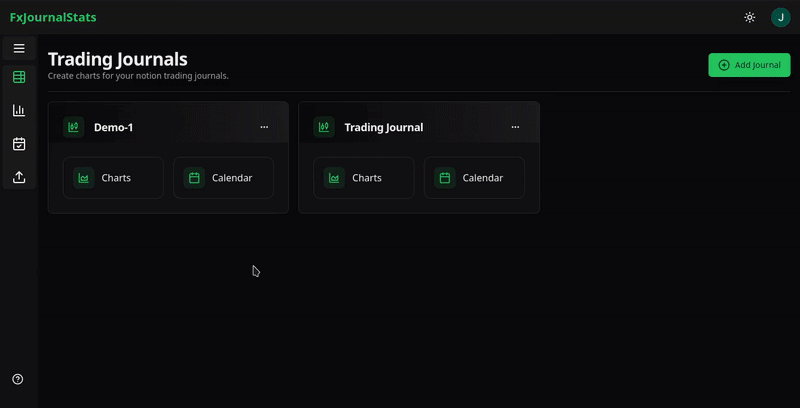
Navigate to the Calendar Page by clicking on the "Calendar" tab in the navigation menu. This is where you'll manage and create calendars linked to your Notion journal.
Once on the calendar page, follow these steps:
Select a Journal: Choose the journal you want the calendar to belong to. Think of the journal as a folder for organizing your calendars.
Click "Add Calendar": This will open a modal with a simple two-step form.
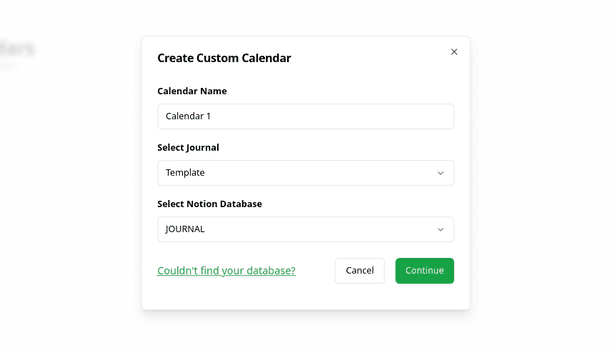
Step 1.1: Enter Basic Calendar Details
- Provide a Calendar Name that reflects its purpose (e.g., "Trading Profits").
- Select the Journal where this calendar will be stored.
- Choose the Notion Database you wish to link.
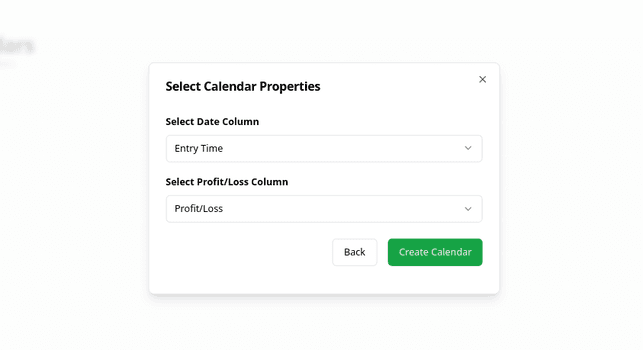
Step 1.2: Map Database Columns
- Pick the Date Column from your Notion database.
- Select the Profit/Loss Column to reflect numerical data on your calendar.
- Once done, click "Create Calendar" to save and close the modal.
Step 2: Copy and Embed the Calendar Link
Your new calendar will appear as a card displaying:
- The Calendar Name.
- The linked Notion Database Name.
- A Copy Icon for the embed link.
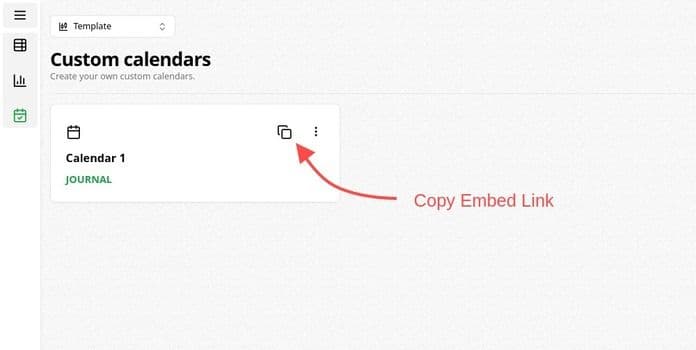
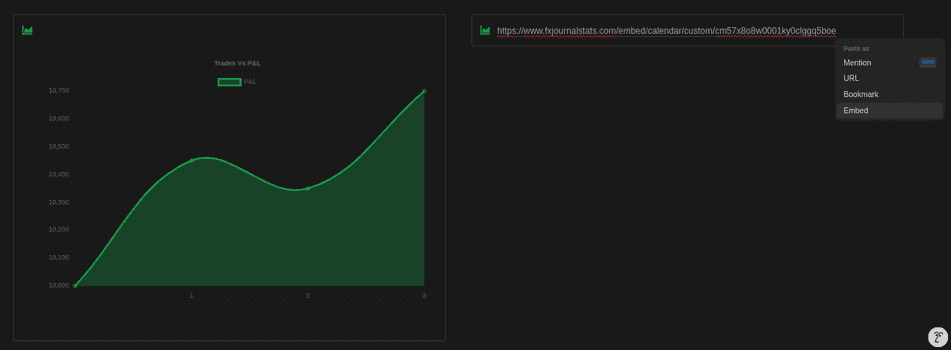
Click the Copy Icon to copy the embed link. Paste this link into your desired Notion page, and your calendar will instantly display within Notion.
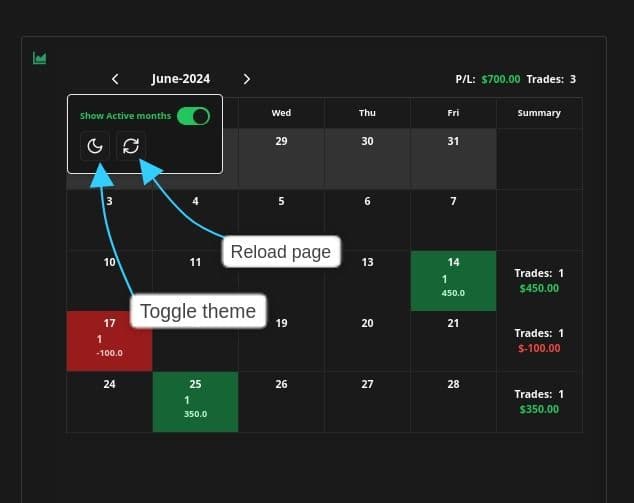
Step 3: Customize the Calendar on Notion
Once embedded, hover over the calendar to reveal customization options:
- Toggle Dark/Light Theme: Switch between a dark or light display.
- Refresh the Embed Link: Ensure your calendar is updated with the latest data.
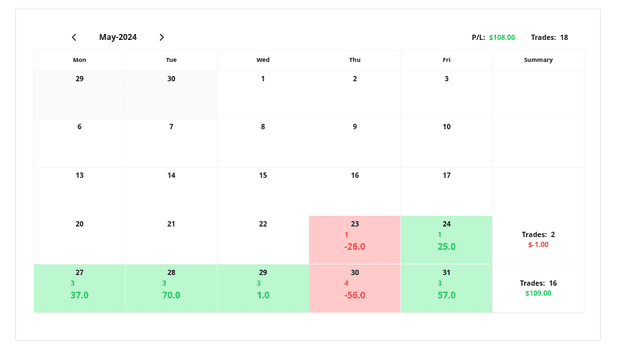
- Show Active Month Only: Enable this option to display only months with entries, keeping your calendar clutter-free.
Why Use a Custom Calendar in Notion?
Custom calendars in Notion streamline task management, allow you to visualize important metrics like profits/losses, and make tracking schedules intuitive. By following this guide, you can create personalized calendars tailored to your needs, enhancing your Notion experience.
Suggested Posts
How to Export Your TradingView Trade Data and Turn It into Actionable Insights
TradingView is a powerful platform for traders, offering advanced charting tools and broker integration. However, analyzing your trading performance requires more than just charts—you need data.
Read more
How to Export MatchTrader Trade Data for Analysis: A Step-by-Step Guide
Analyzing your trading data is a powerful way to identify trends, optimize strategies, and improve performance. MatchTrader makes it simple to export your trade data, and with tools like FxJournalStats, you can transform your data into insightful charts and calendars...
Read more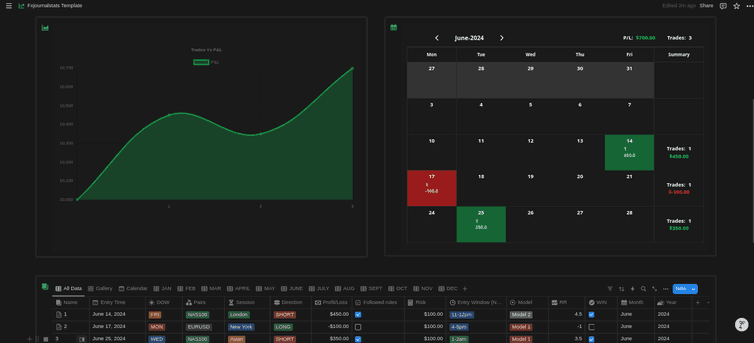
Step-by-Step Guide to Adding Analytics (Charts & Calendars) to Your Notion Journal with FxJournalStats
Learn how to enhance your Notion journal with powerful analytics using FxJournalStats. This guide walks you through creating custom charts and calendars, linking them to your Notion database, and tracking data visually for better insights and productivity.
Read more